Friday, March 31, 2023

Puffed bubble quilt Nr. 6

Had an extremely happy customer this morning when she picked up her baby's quilt she ordered in turquoise, brown and beige.  The quilt top as well as the back was done in 100% cotton.  I usually use a mix of different fabrics as it is more cost effective but getting different prints and/or shades in any one color is just an uphill battle.  So, off to our local Elna dealer I went after a fruitless stop at Jacksons whose variety of quilting fabric has sadly diminished alarmingly.


Whilst surfing the internet, I stumbled onto yet another technique to construct a bubble quilt and decided to combine it with Tracy's method which I used to stitch this quilt.  What I like about Narelle's method is creating the pleats before sewing all the blocks together as you can then alternate the directions of the pleats creating less bulkier seams.  It was also a lot faster than Tracy's method where all the pleats have to be created and stitched one by one which felt like it took an eternity.  So with puff quilt number 6 done and dusted, I finally have a less time-consuming method with a backside that fits snuggly. 

Saturday, March 25, 2023

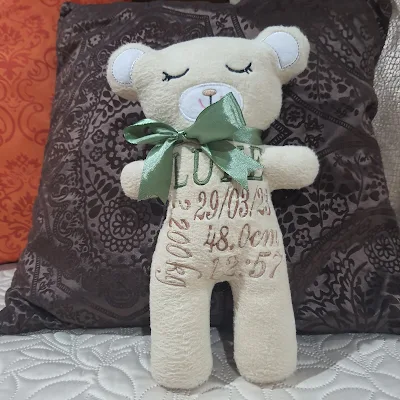
Baby Statistics Bears

First two orders received for these adorable bears.  The first one for a little girl called Lara Kate


and the other one for a little boy called Luke.

Design available from Ofnah


Tuesday, March 21, 2023

Simply Chic Carry All Number 6

After gifting a friend of mine one of these bags, she promptly ordered another one for her knitting and crochet supplies.  I rummaged through my drawers and found a beautiful and colorful Da Gama fabric to use for the outside of the bag. Went to the shops to buy coordinating fabrics as well as all the other supplies needed and started cutting and labelling the 57 pieces of fabric, corlene, batting and vinyl needed to stitch a bag.


Preparation included ironing the corlene to the various pieces of lining, quilting the outside panels of the bag and making bias binding.


I always use a serpentine stitch with a double needle to do the quilting with a variegated thread.


After finishing off the outside of the bag with an outer pouch and ribbon loops for attaching the handles,


it was time to move on to the inside and stitch both pockets.


The next step is to make the gusset and add the back and front panels as well as both inside pockets to the gusset and with that the main part of the bag is complete.


Here the bag is opened up and below when zipped up.


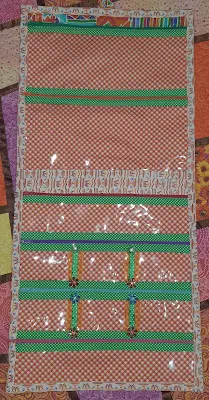
The last item to stitch, was the bag insert which attach to the Velcro inside the main bag.


With the main fabric being so colorful, I bought a whole rainbow of zips which might be a drawback as it means multiple thread changes.


I just loved stitching this bag as nothing is really difficult to construct although it looks complex.  I must also complement our local Pfaff/Husqvarna dealer whose instructions are still clear to follow even 13 years after stitching the original bags - this post refers.

Store opened on Oregon Patchworks

Ever since winning the full Embroidery Studio by Sierra in 2004, I dabbled with digitizing designs as well as wanting to open an online stor...